How to use SAML 2.0 protocol to access Secret Server
Secret Server allows the use of SAML Identity Provider (IDP) authentication instead of the normal authentication process for single sign-on (SSO). To do this, SS acts as a SAML Service Provider (SP) and communicates with Monokee that's acting as a SAML IDP.
In this use case, the user who wants to access Secret Server will not log in through a Secret Server form, but will be redirected to Monokee, which will take care of validating the credentials and communicating the data necessary for user identification to Secret Server, which will eventually log the user in.
Then, the former authenticates the user and provides the latter with the attributes necessary for it to be correctly identified and for it to access the service.
In the following article we explain how the proposed scenario can be put in place; therefore, the steps to be taken on the Secret Server side and the Monokee side in order to achieve a proper SAML 2.0 configuration related to the two providers will be explained.
Monokee Configurations
In order to get Monokee's domain and Secret Server's domain to communicate properly, you need to do three things on Monokee:
- A Add a custom attribute where the user's identifier will be present on Secret Server
- B Set up a SAML 2.0 identity provider that has the correct parameters to successfully work with Secret Server
- C Configure a SAML 2.0 application with all the parameters related to Secret Server.
The first two points will be explained below, while the third will be discussed in more detail after the necessary Secret Server-side operations are explained.
A) Attribute to Identify the User on Secret Server
Secret Server allows the user to be identified only by username which is uniquely within the custom domain.
It is therefore necessary for the Monokee side to have a custom attribute in which this field is saved for each user in the domain.
It is assumed that an attribute called secretserver_user exists for this purpose. Creating and enhancing this field for domain users is outside the scope of this article.
B) Setting up the Identity Provider on the Monokee side
The next stage is to configure the Identity Provider, let's see what steps are required to accomplish this.
Navigate to your Monokee custom fully qualified domain name (FQDN) or if you haven't set up a custom FQDN, go to Monokee's default page and enter your domain ID. Then, enter your login credentials to access your account.
Open the left sidebar and select SAML Providers from the menu.
This will display a two-tab page, choose the IDENTITY PROVIDERS tab. Click the Add button located in the top right corner.
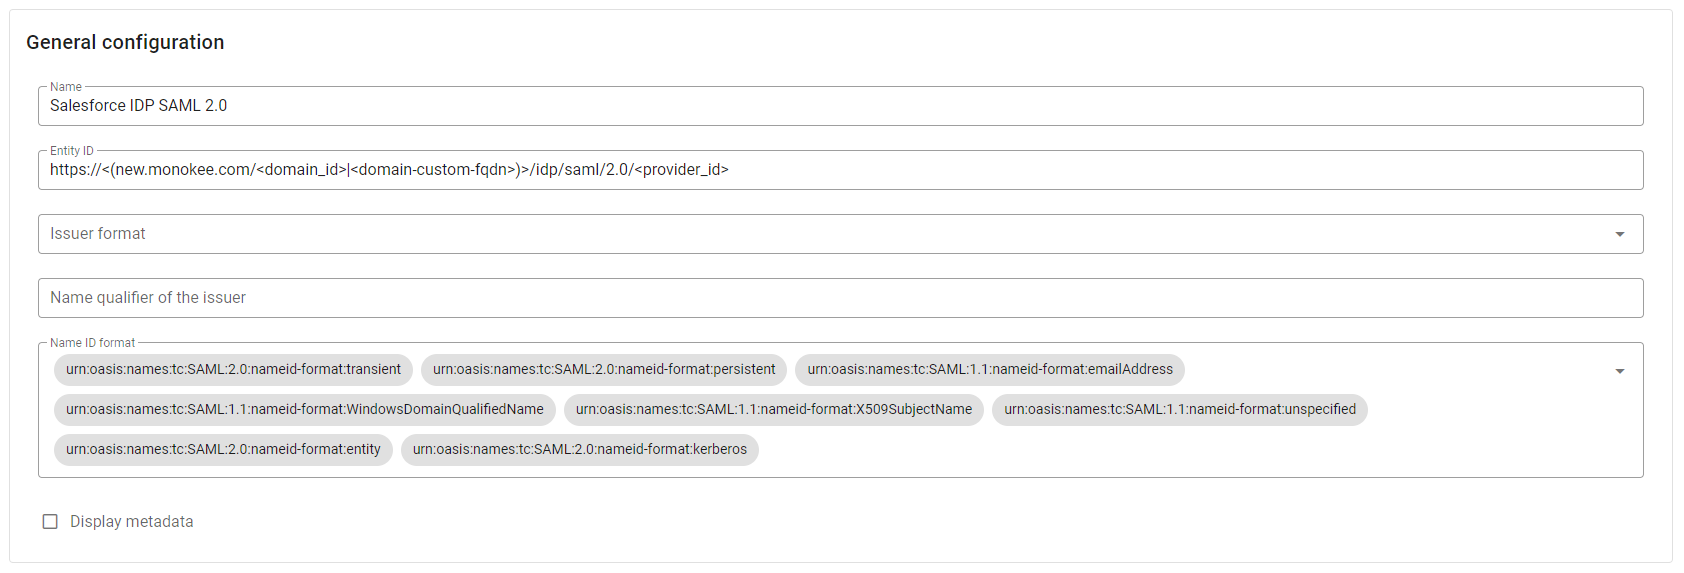
Within the presented modal, in the General configuration section, enter the desired Name for your new provider, such as Secret Server IDP SAML 2.0. Leave all other settings unchanged.

For this use case, it is not necessary to specify values for Organization and Contact person, so you can leave the fields of the two reference sections empty.
Secret Server supports sending signed SAML Requests, so the flag IDP requires signed authentication requests in Signing options section can be checked.

Load your PKCS1 Private Key and the corresponding Certificate in the Signature section. If you want you can generate this key-pair with the following openssl command:
openssl req -x509 -sha256 -nodes -days 365 -newkey rsa:2048A series of information will be asked, here's an example:
- Country Name: IT
- State or Province Name: TN
- Locality Name: Trento
- Organization Name: Monokee
- Organizational Unit Name: Monokee SAML 2.0
- Common Name: 1f414952-d73b-4c79-a3cb-fb5d413fe5fe
- Email Address: john.doe@example.org
cautionFor the Common Name you can use the value of <provider_id> generated by the Entity ID.

This command should output a certificate directly in the terminal and the private key will be placed in a file named privkey.pem. The private key will be in PKCS8 format so it must be converted to PKCS1 with the following command:
openssl pkey -in privkey.pem -traditionalThe new private key will be displayed in the terminal output.
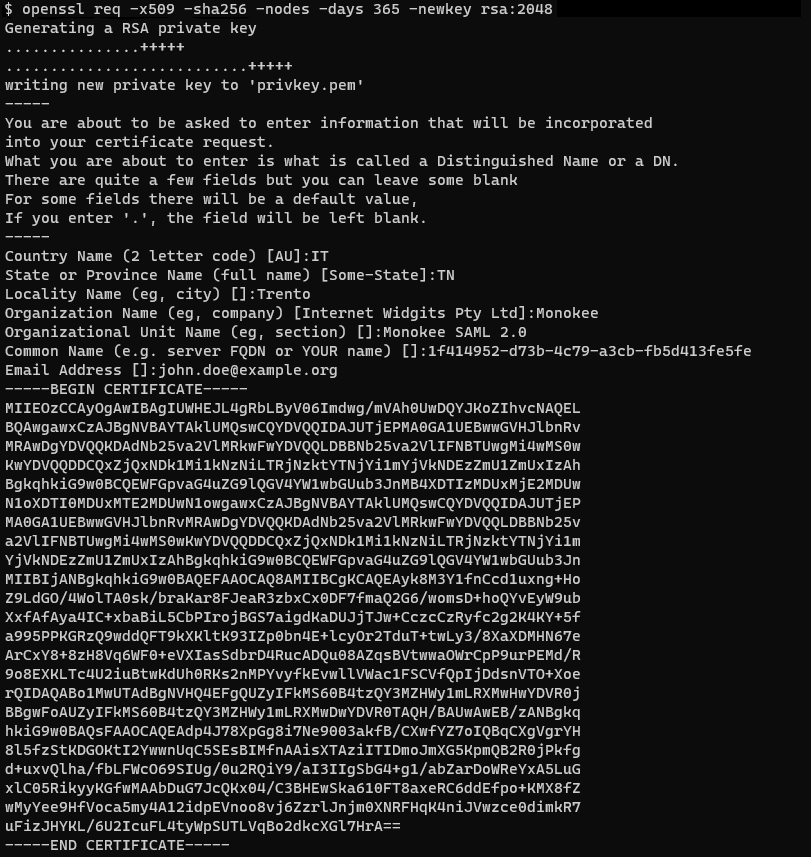
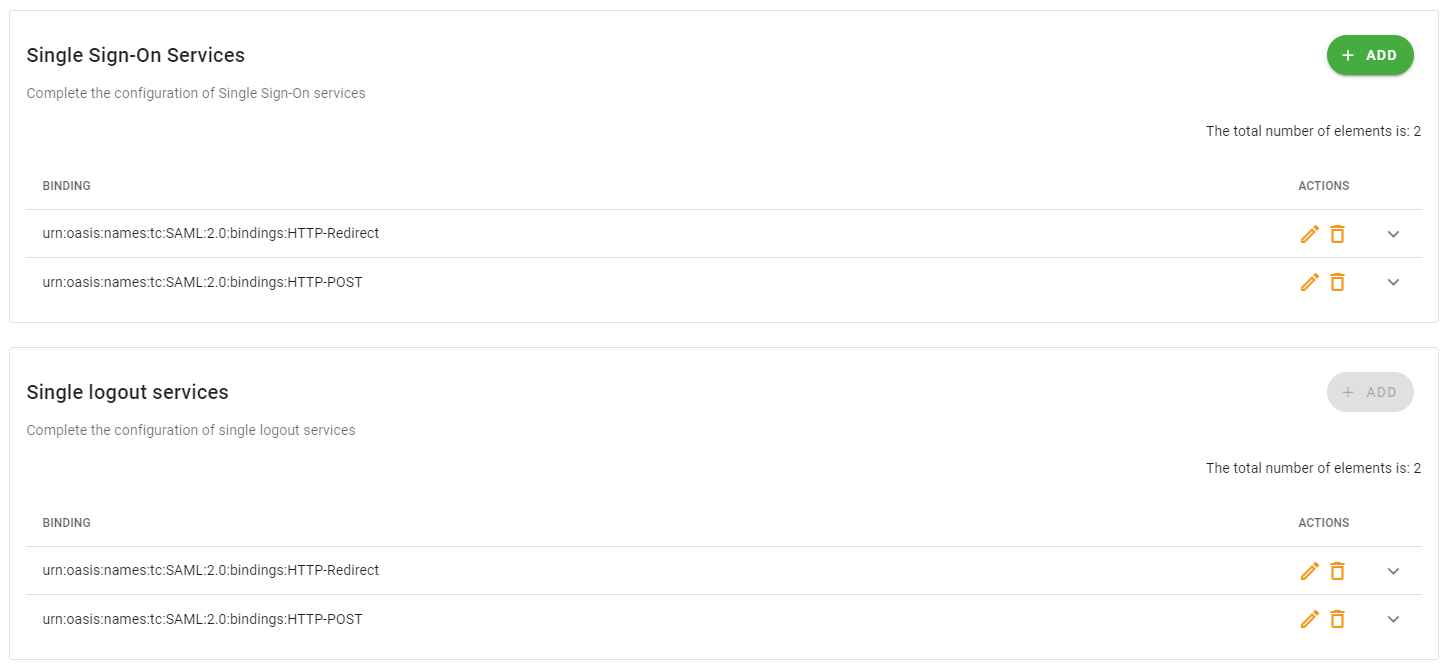
Figure 3 - Certificate Creation Output Left untouched the Single Sign-On Services and Single Logout services configurations.
- The Attributes section can be left empty, as Secret Server does not require any additional attributes other than the subject.

Click the Save button to save the configuration.
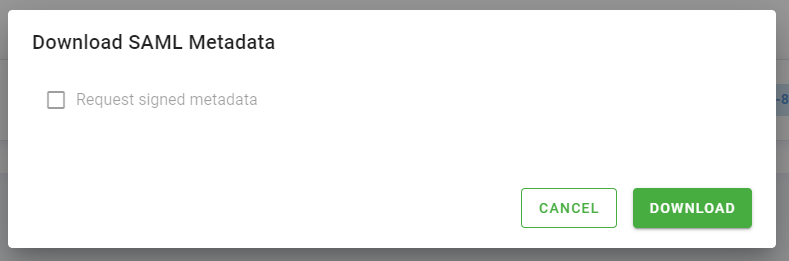
Now click the button representing a cloud with a downward arrow to download the identity provider metadata file you just created. Upon clicking the button a modal will be opened, so download the file by pressing the Download button without flagging the Request signed metadata checkbox. The file you just downloaded will be needed for Secret Server side configurations.

Secret Server Configurations
Let's leave aside for a moment the configuration of the SAML 2.0 application on Monokee to complete the part about defining the service provider on the Secret Server side. These informations will then be necessary for the creation of the application on Monokee.
Below is the procedure for importing the SAML 2.0 identity provider details just defined on Monokee to Secret Server and for downloading the SAML 2.0 service provider metadata that is associated with Secret Server.
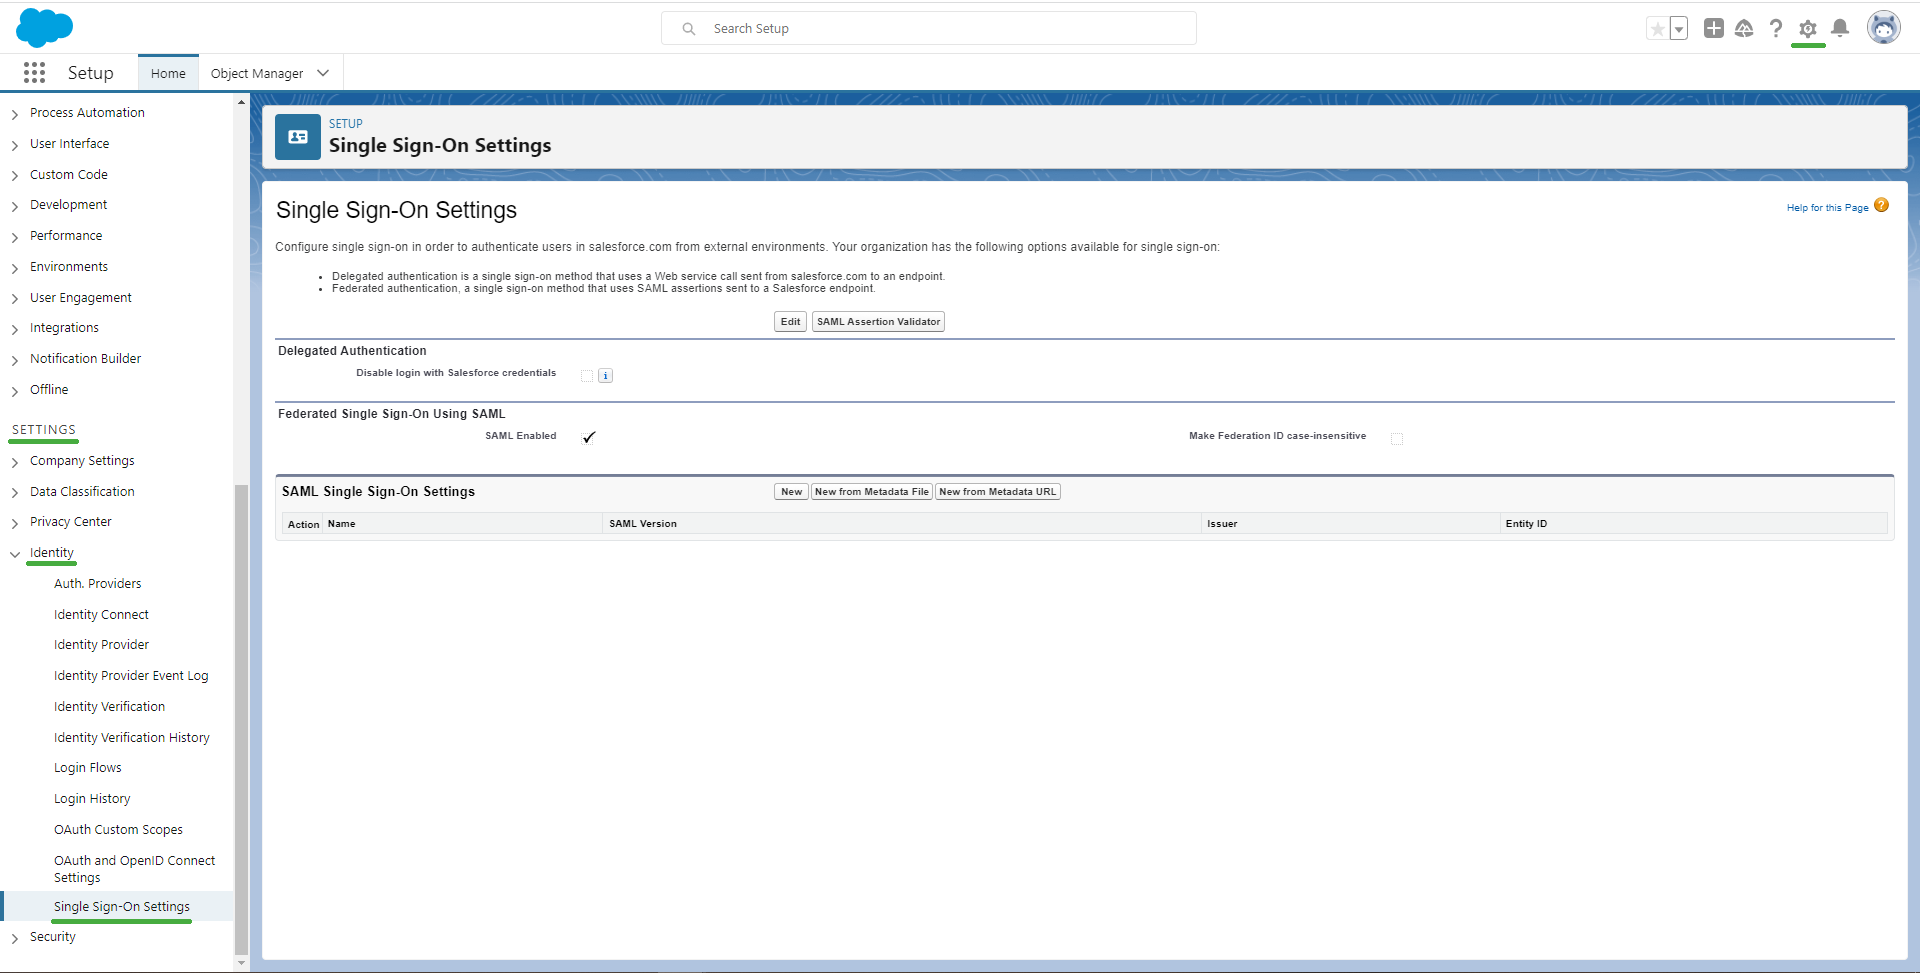
- As a first step, access your Secret Server domain. You must use a user with an administrative role.
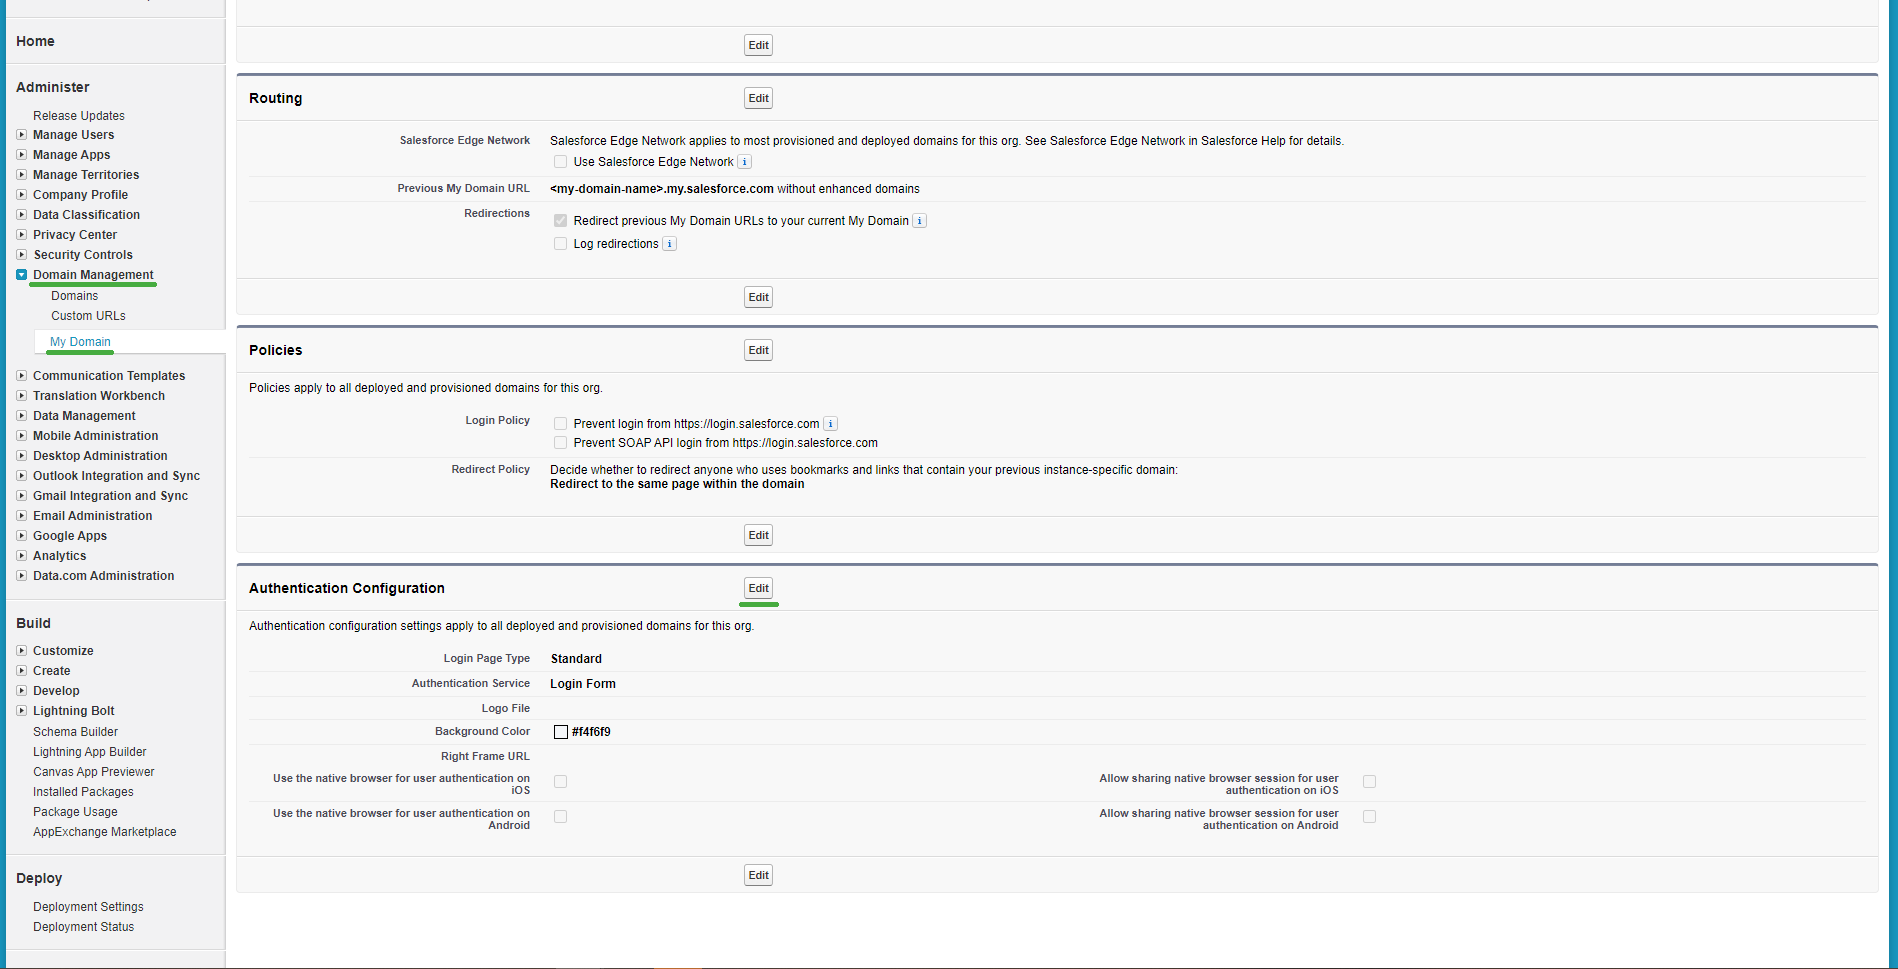
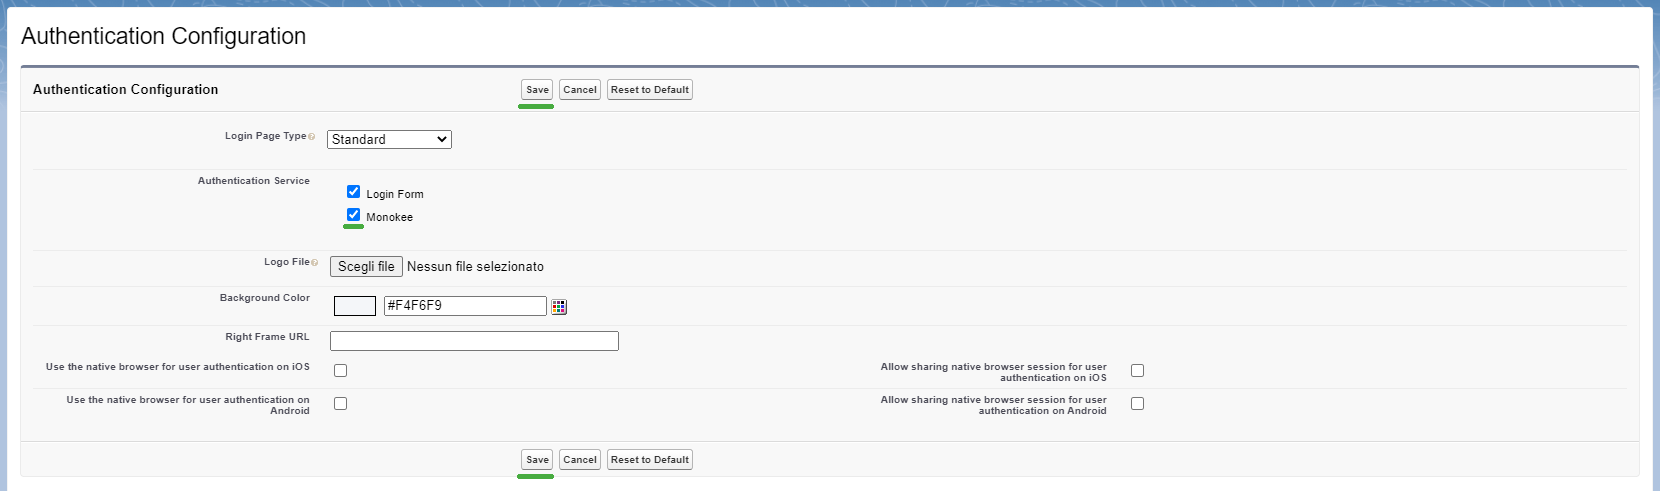
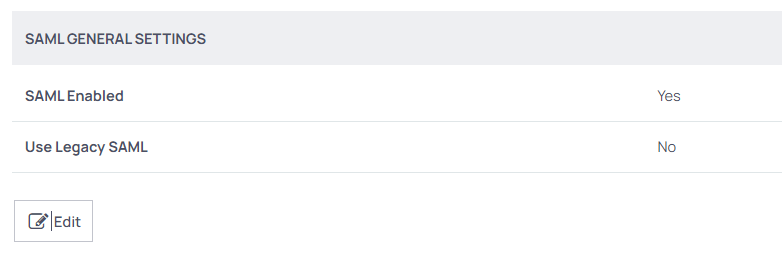
- Once logged in, go to the Single Sign-On Settings section, which can be found in the left menu at the Administration > Core Actions > Configuration > SAML. Click on the edit button and check the checkbox of the SAML Enabled option to enable it. Click the Save button.
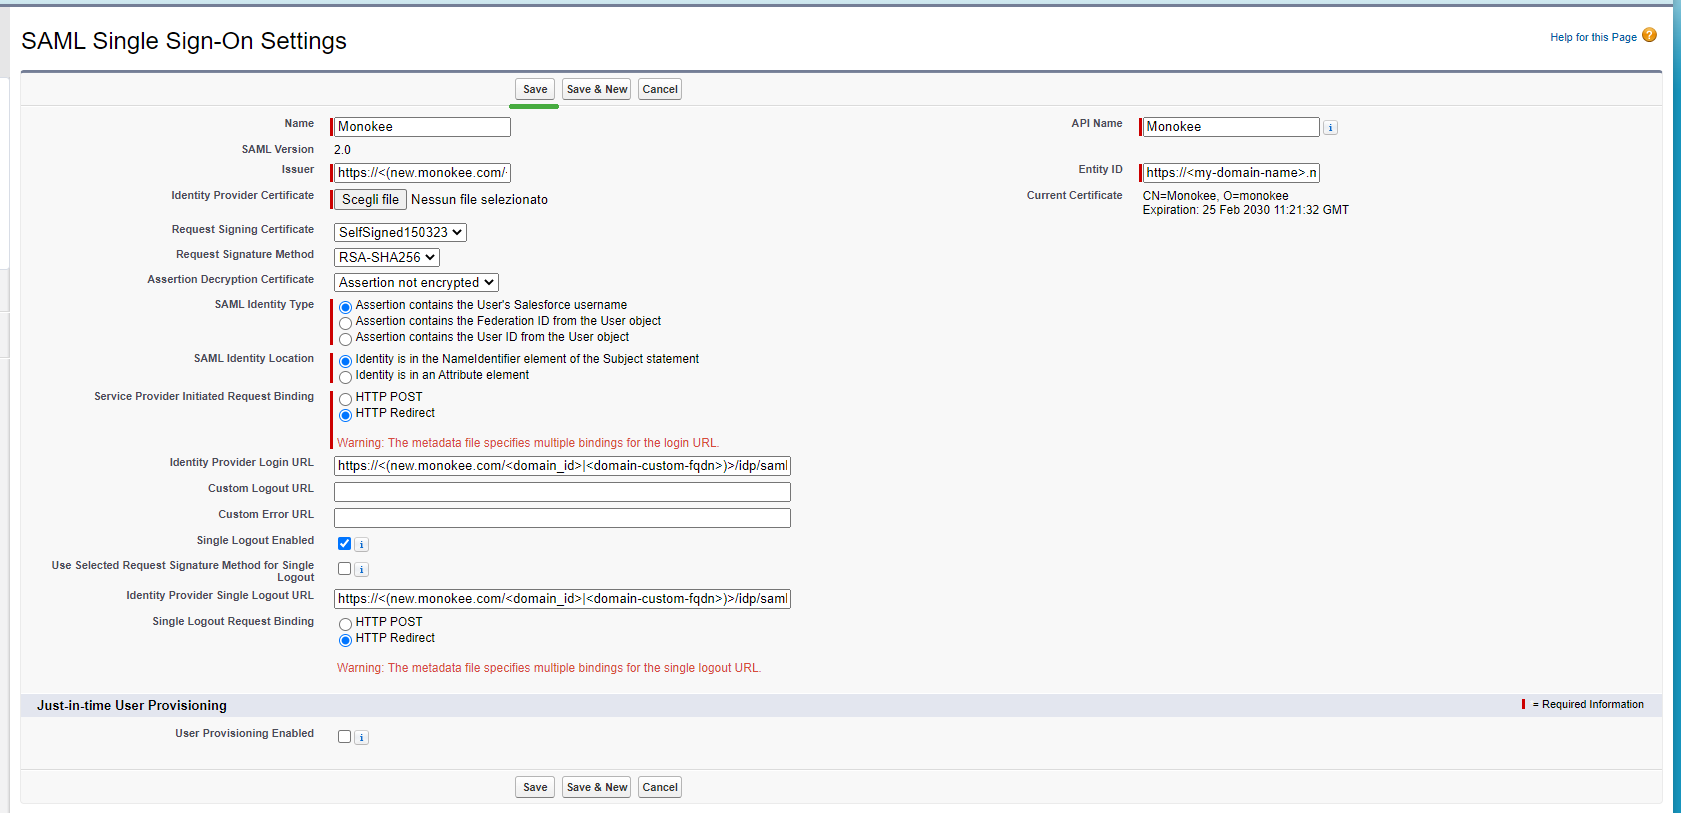
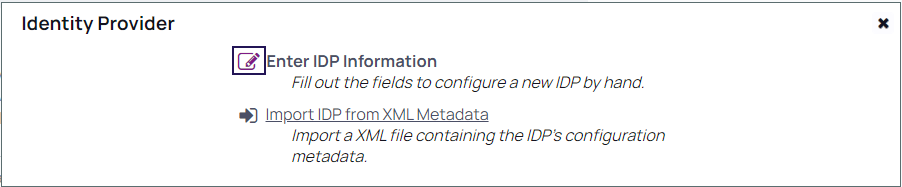
- From this screen you can also upload the identity provider configuration previously created on Monokee. Under IDENTITY PROVIDERS section click on Create New Identity Provider. A popup will be displayed with 2 options. Click on the second option which is Import IDP from XML Metadata. Select the file idp_metadata_Secret Server IDP SAML 2.0.xml exported previusly from Monokee.

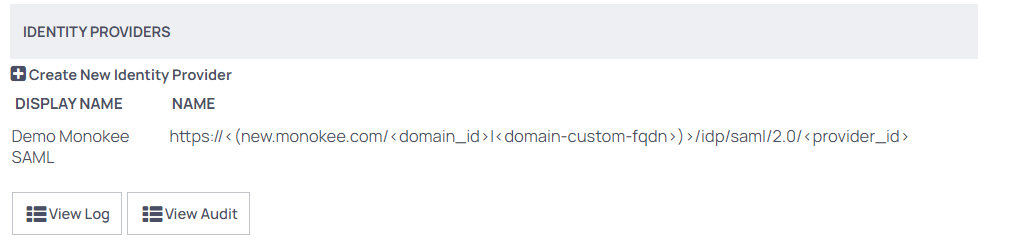
- After the successful upload, you will note the Identity Provider is added under this section (You can change the DISPLAY NAME as you like, it will be displayed later on the LOGIN PAGE).
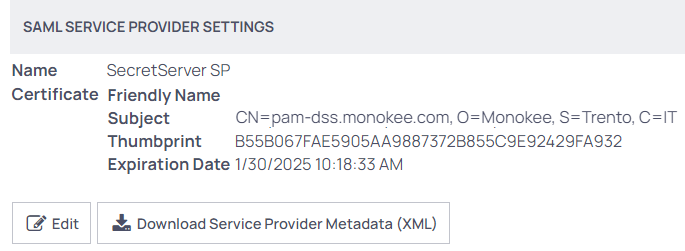
- Now that the Identity provider has been added, it is possible to download the service provider metadata related to the Monokee configuration. This file will be useful for creating the SAML application on Monokee. Before doing that you need to set a Name that must be identical to the Entity Identifier field in Monokee App by clicking on the Edit button. As an example we choose the SecretServer SP name. A SSL certificate of the Secret Server Public FQDN must be also added by clicking on the "Select certificate" link, in our example it was generated by Let's Encrypt. Click on the Download Service Provider Metadata (XML) button.
We now have all the necessary data to proceed with the creation of the SAML application on Monokee.
C) Create SAML 2.0 Application on the Monokee side
The last configuration to do before you can test Secret Server access via SAML 2.0 protocol is to create a SAML Application on Monokee by following the procedure below:
Navigate to your Monokee custom fully qualified domain name (FQDN) or if you haven't set up a custom FQDN, go to Monokee's default page and enter your domain ID. Then, enter your login credentials to access your account.
Open the left sidebar and select Applications from the menu.
This will display a list of applications. To create the application, click the Add button located in the top right corner of the table. Then, select SAML Application and click Add.

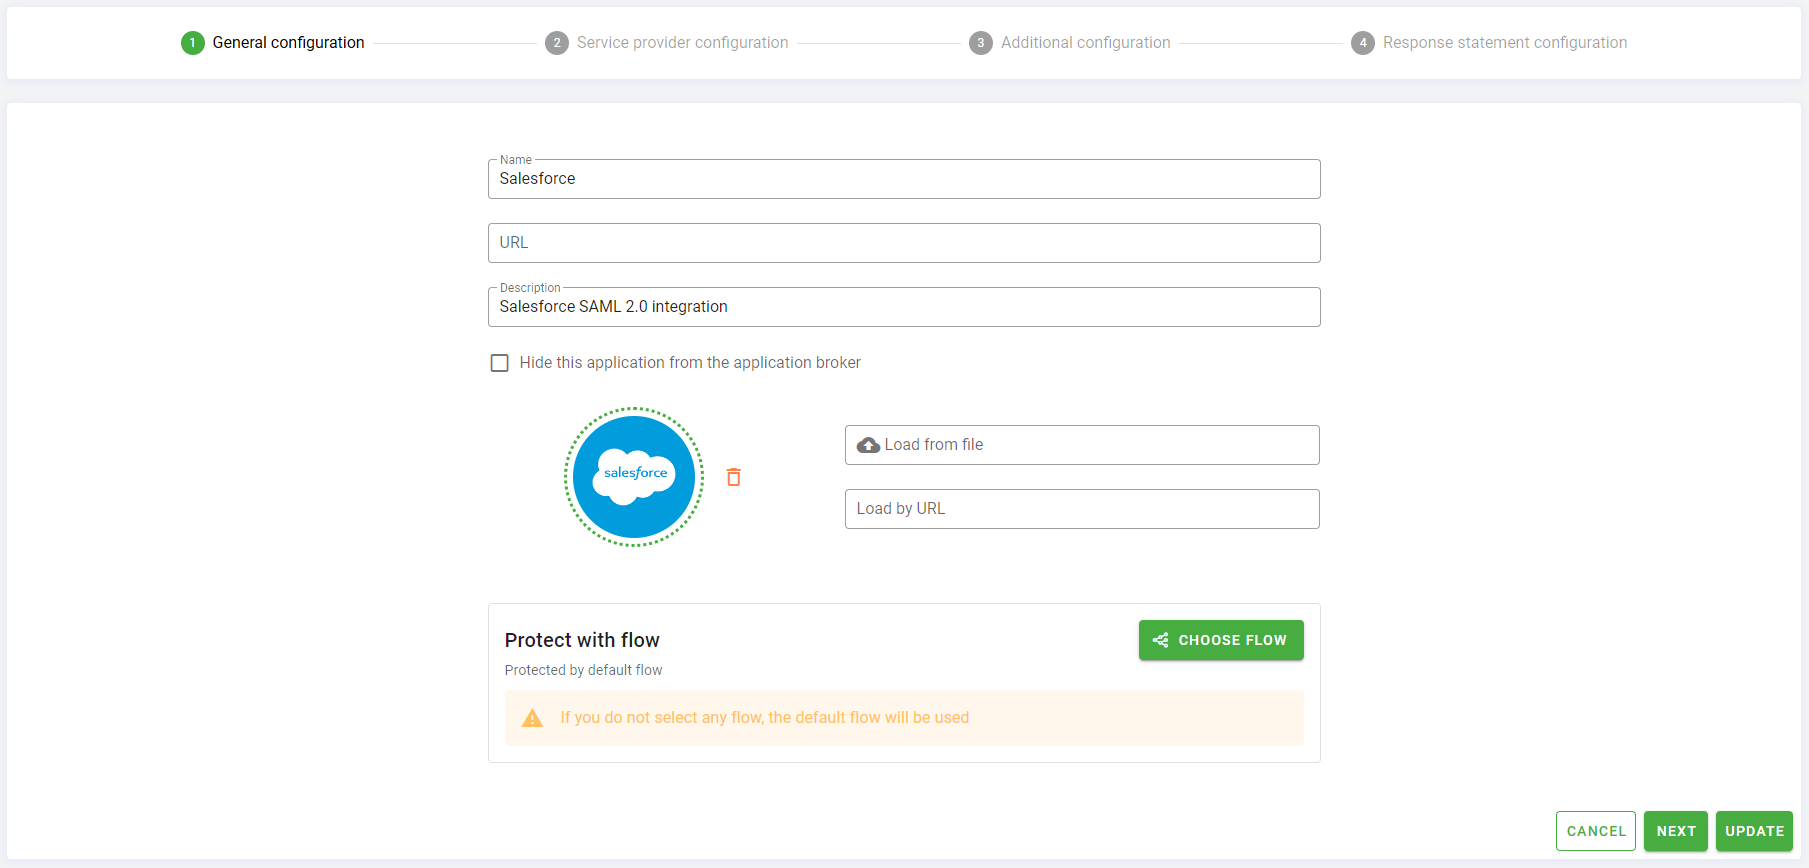
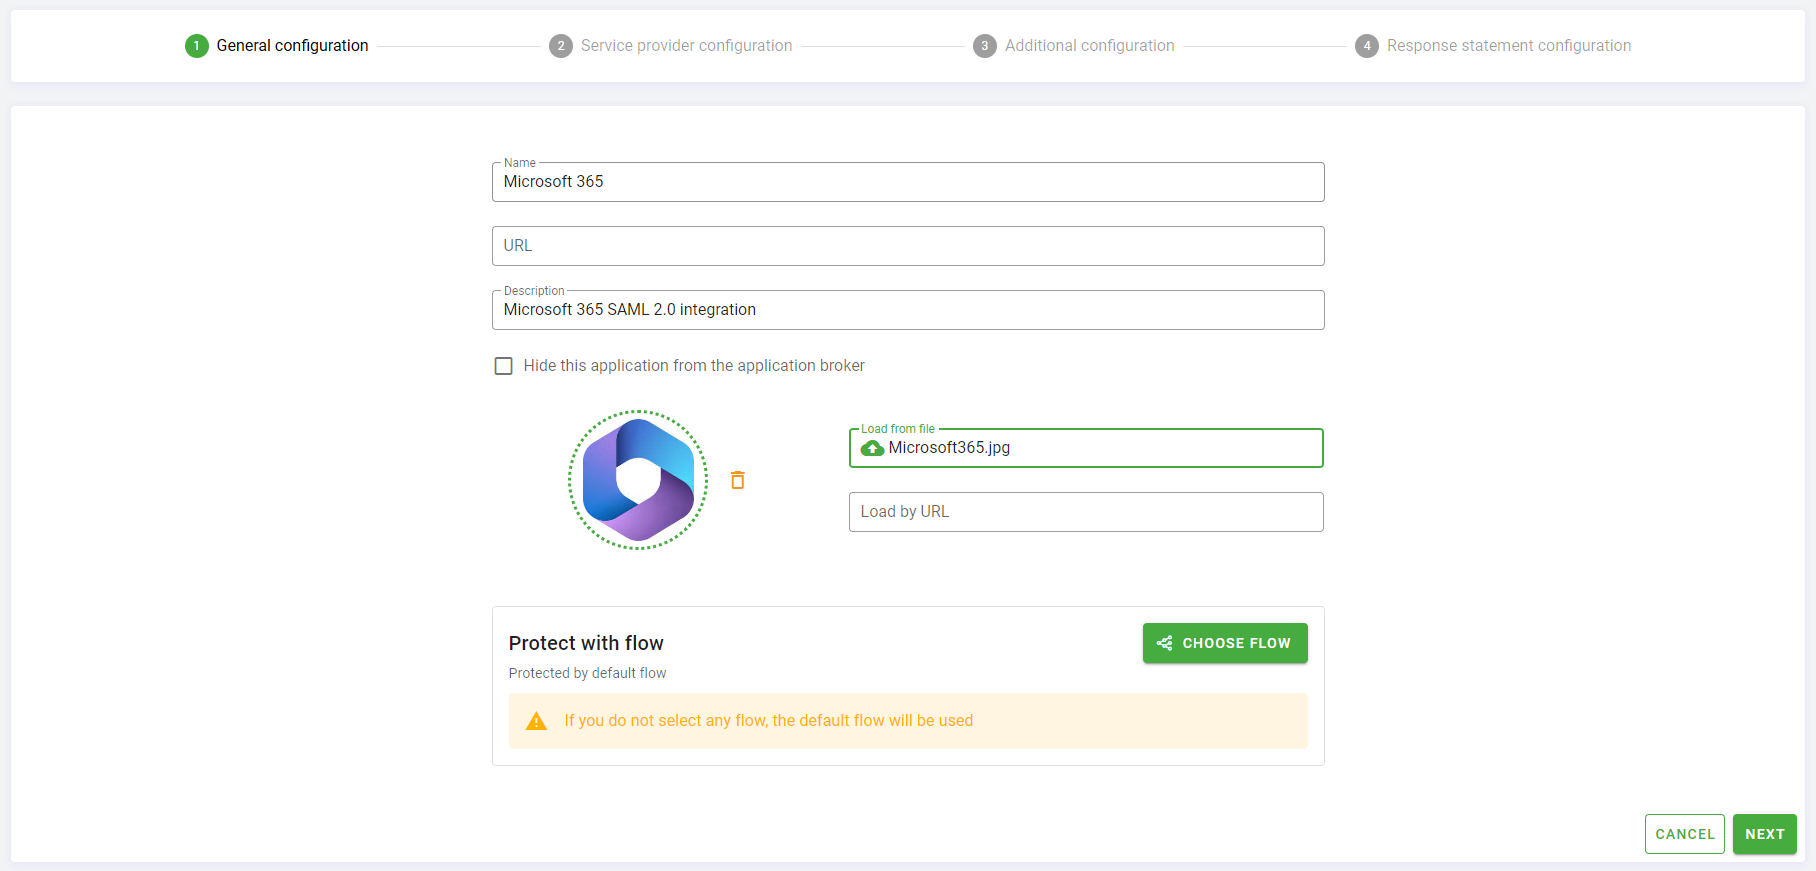
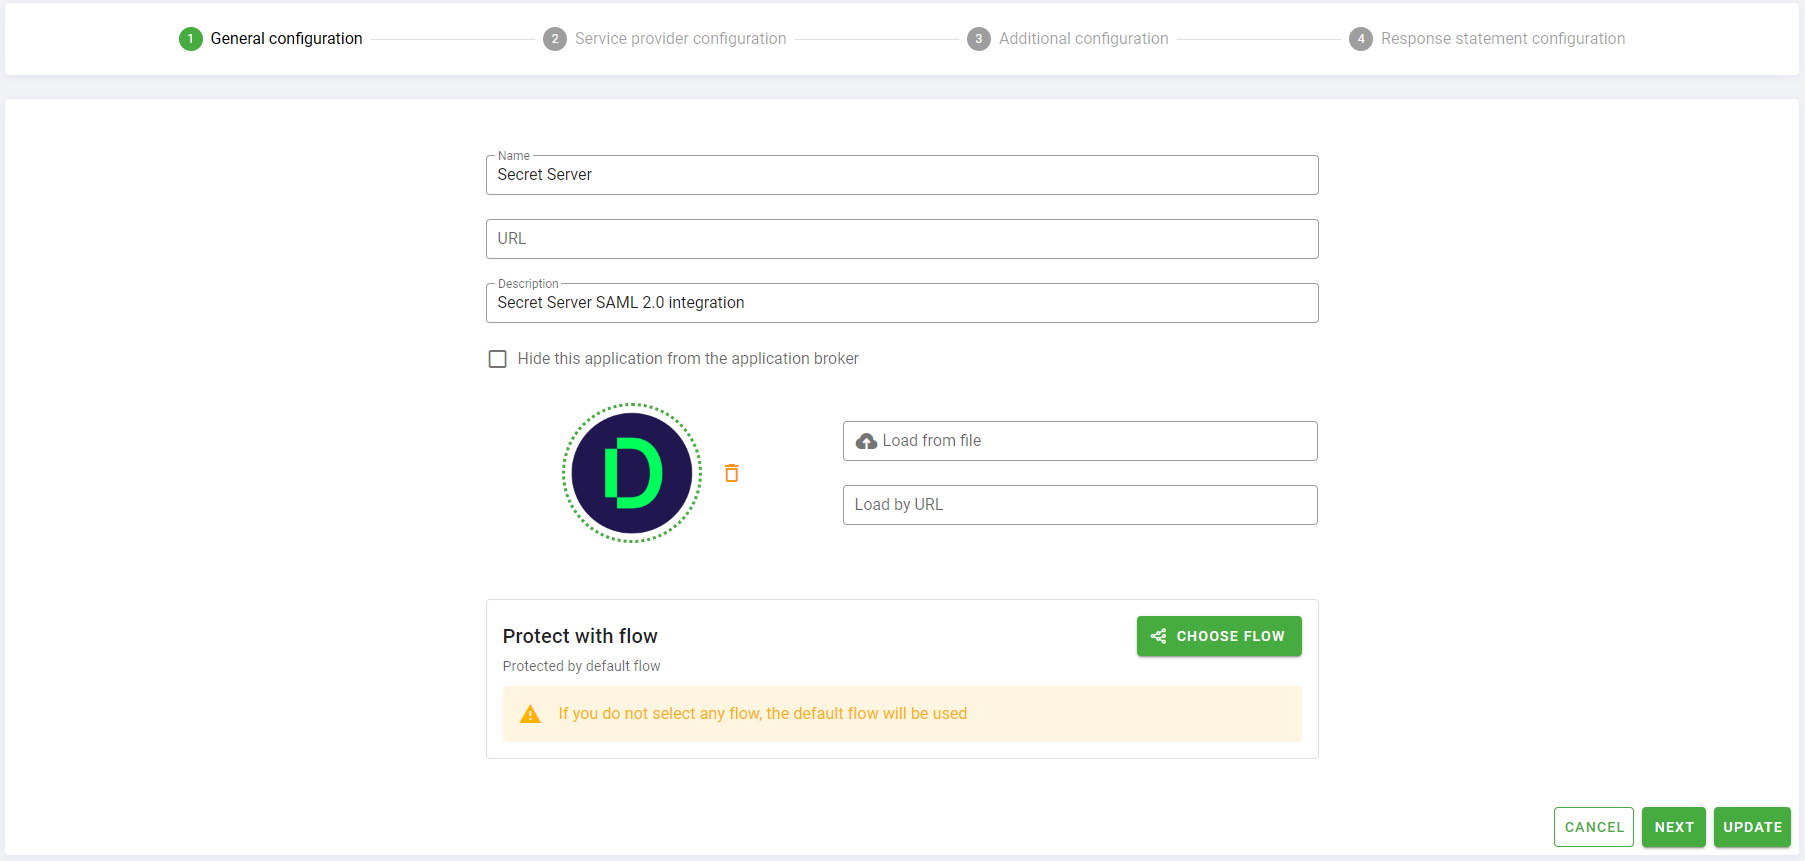
Monokee will open the General Configuration step.
Set the Name of you application. For example Secret Server.
Leave the URL parameter empty.
Optionally, set a Description for your application, for example Secret Server SAML 2.0 integration.
Leave the Hide this application from the application broker parameter unchecked, this will allow you to see the application in Monokee Application Broker.
You can load an optional application icon using the Load From File or Load by URL options.
Skip the Protect with flow configuration. In this way the default Authentication Flow will protect this app.
Click Create to proceed to the SAML 2.0 specific configuration. You will be referred to the Service Provider Configuration step.
- In the Service Provider metadata section you can load the Secret Server metadata previously downloaded. You can load it directly from Load from file input. This operation will automatically fill all the fields on this step.

Check the
SP signs authentication requestsandSP requires signed assertionsoptions and add the public certificate of your public FQDN that you have generated in the previus step "Secret Server Configurations - 5".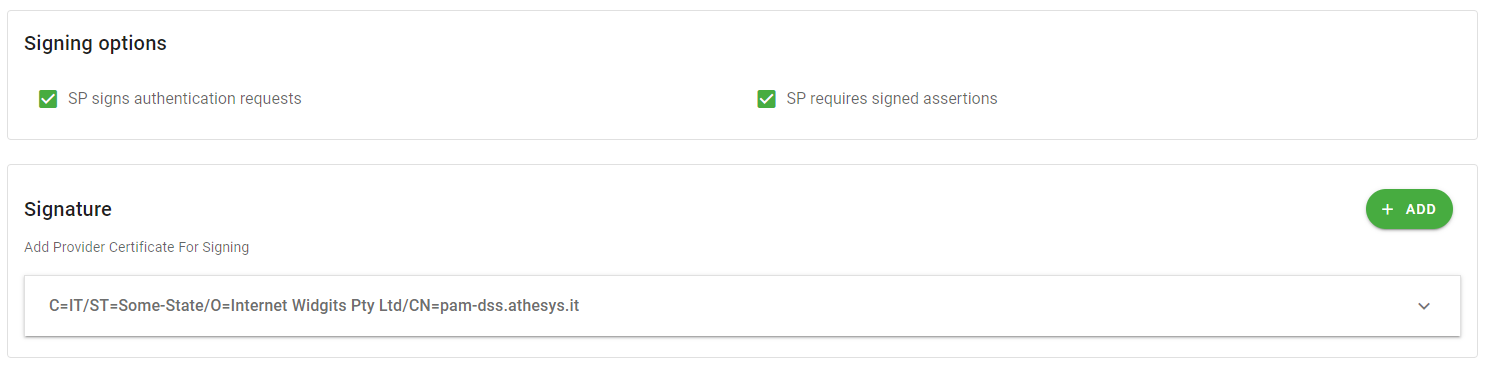
Figure 17 - Signing Options And Signature Click Next to proceed to the Additional Configuration step.
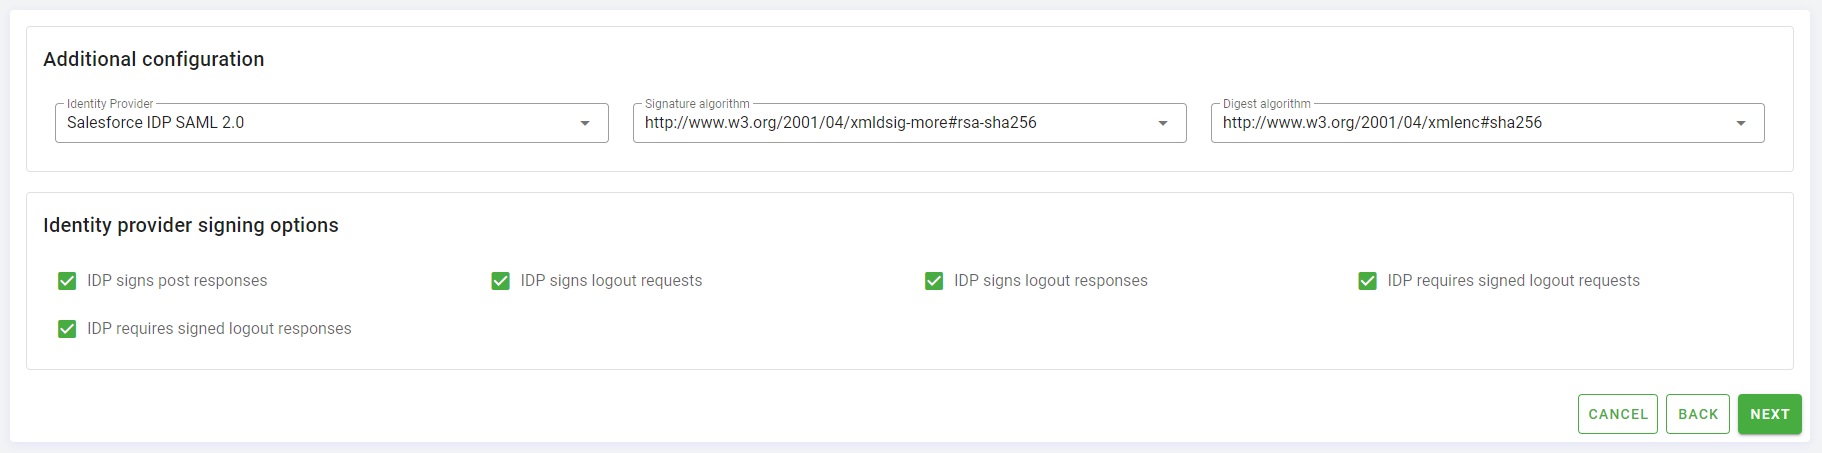
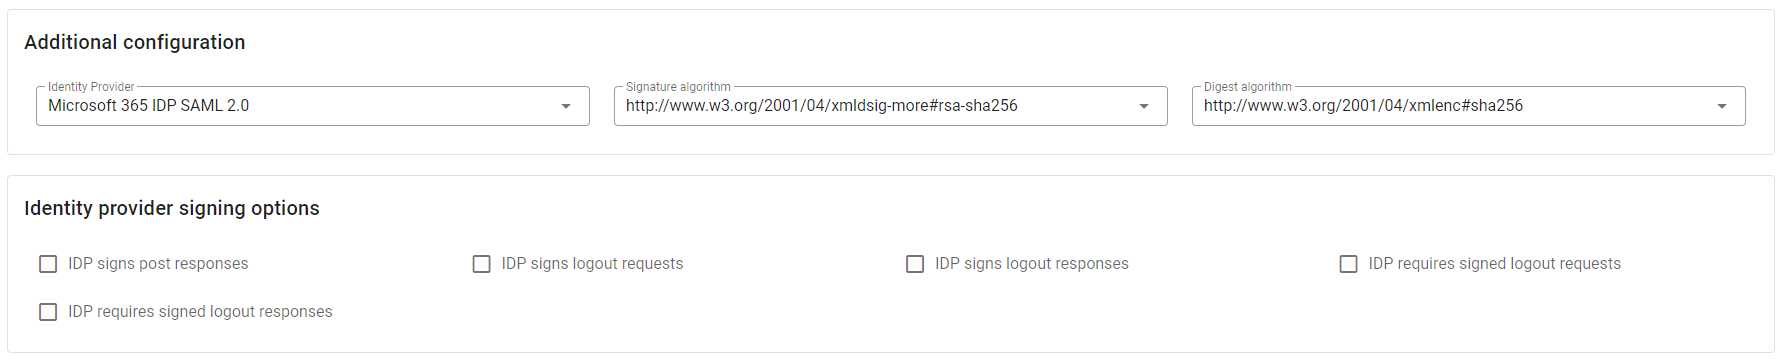
In the Additional Configuration section, in the Identity Provider input select, choose the identity provider created before Secret Server IDP SAML 2.0, in Signature algorithm choose the value
http://www.w3.org/2001/04/xmldsig-more#rsa-sha256and in Digest algorithm the valuehttp://www.w3.org/2001/04/xmlenc#sha256.All the fields in Identity provider signing options can be checked.
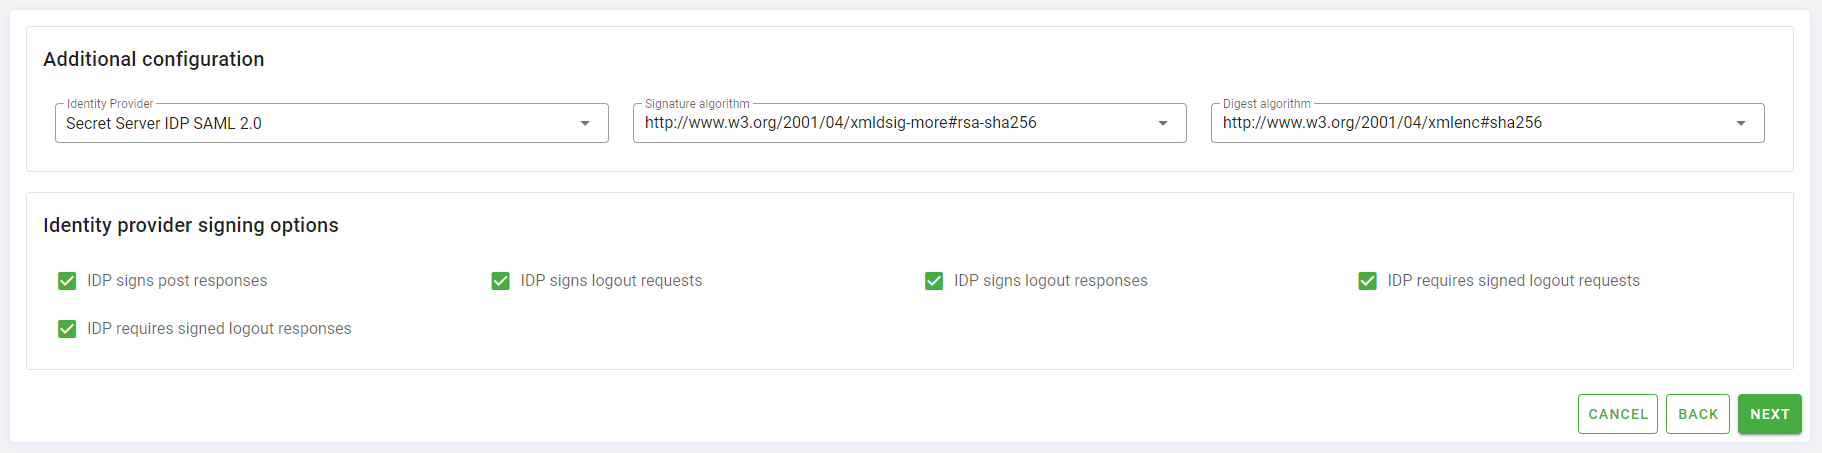
Click Next to proceed to the last step Response Statement Configuration.
In the Authentication statement options select
urn:oasis:names:tc:SAML:1.1:nameid-format:emailAddressas Subject format andurn:oasis:names:tc:SAML:2.0:cm:beareras Subject confirmation method.

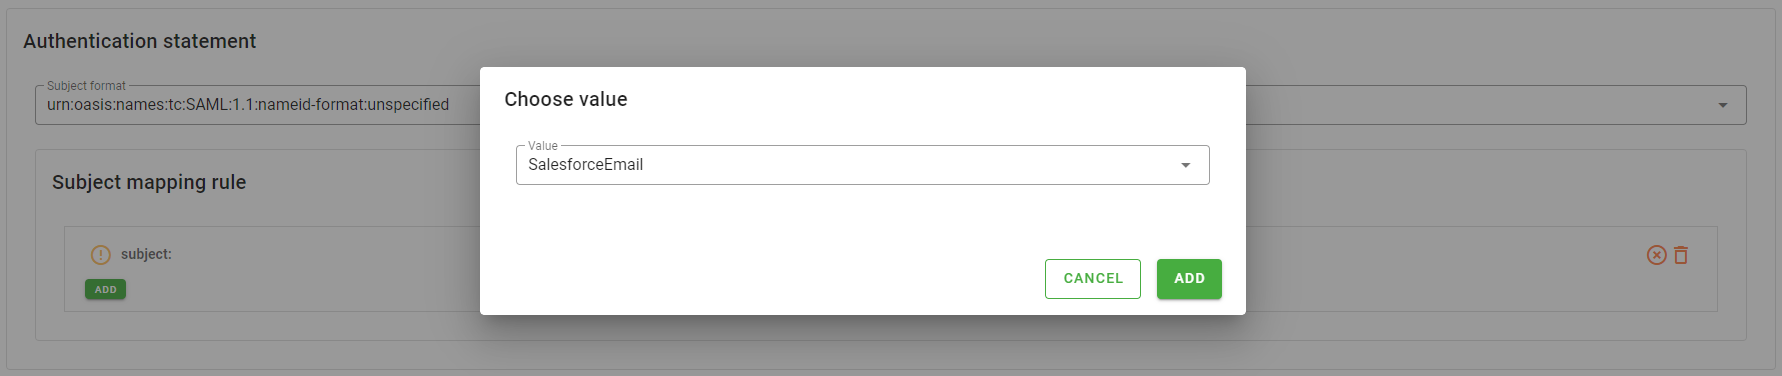
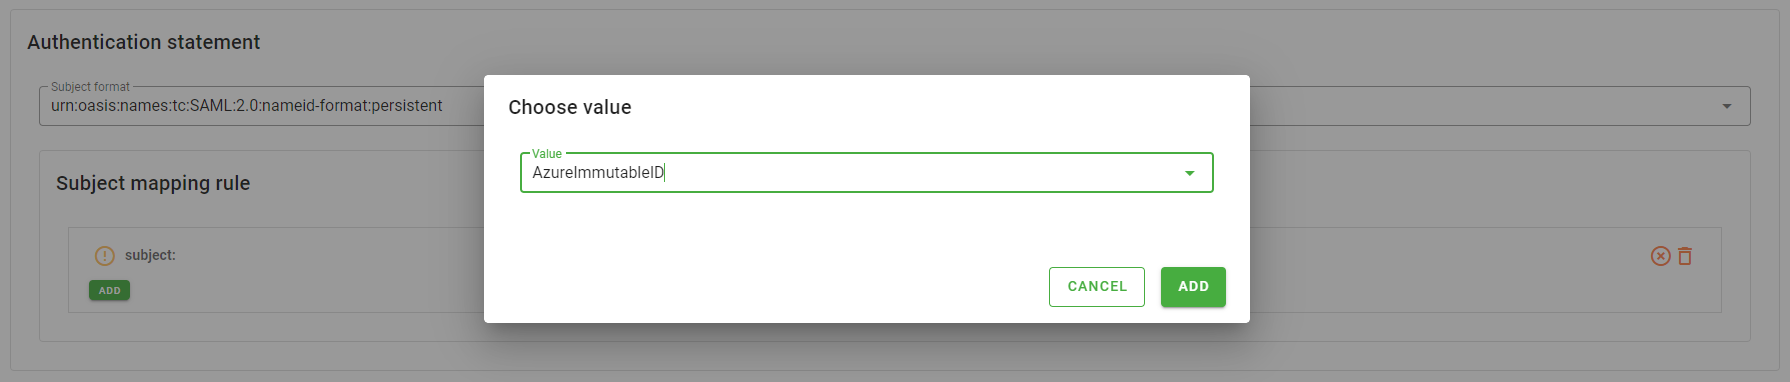
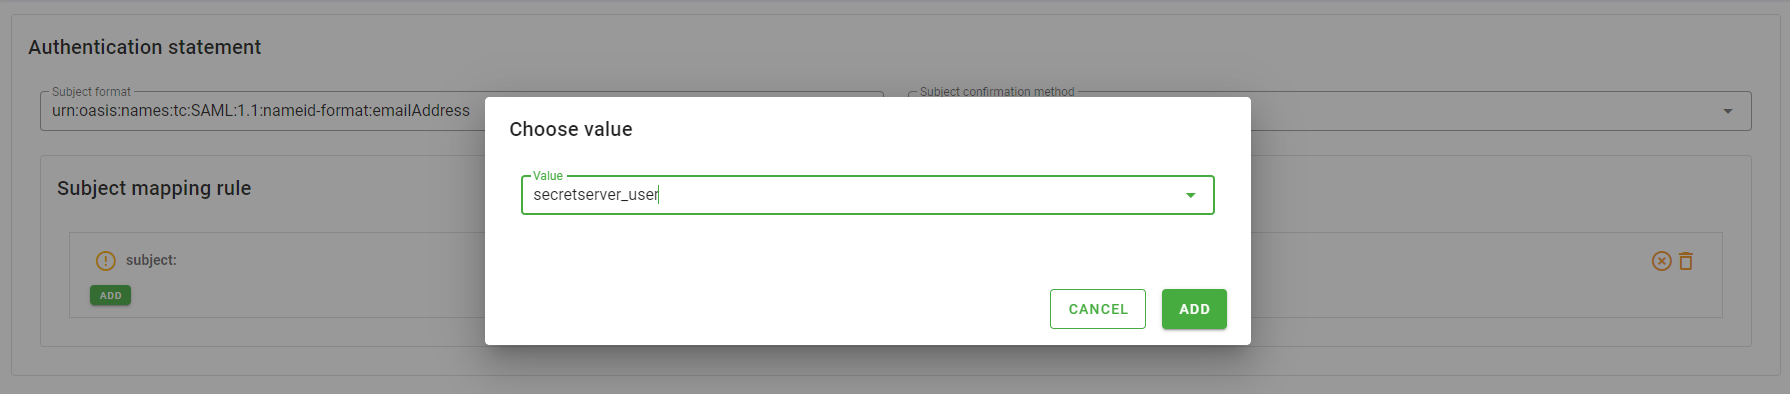
- In the Subject mapping rule you must specify the attribute to be mapped with the subject. To do so, follow the steps:
- Click the pencil icon next to subject label
- Click the Add button, a dialog will appear
- In the Value select present in the dialog choose the attribute
secretserver_user - Click the Add button in the dialog
You can left the Attribute statement section empty.
Click the bottom right corner Create button to save the configuration.
You can now associate the newly created application with the users and groups for which you need to grant access to the application.
Time to test the configuration
It is now time to test the configuration made.
As a first step, we need to value the secretserver_user attribute for all users who are to have access to the application. For testing purposes, you can first do this with your own user. The value of the attribute must match the username of one of the users in the Secret Server domain that you have federated.
We are going to test the configuration in both the IDP initiated and SP initiated scenarios.
IDP Initiated SSO
In the IDP initiated scenario, the login flow starts from the Identity Provider, so in this case from Monokee. Then go to your application broker and click on the card for the Secret Server application you just created.
The click will cause a new browser tab to open where the SAML 2.0 IDP Initiated login flow will be initiated, after which you will be redirected to the home page of the configured Secret Server domain.
SP Initiated SSO
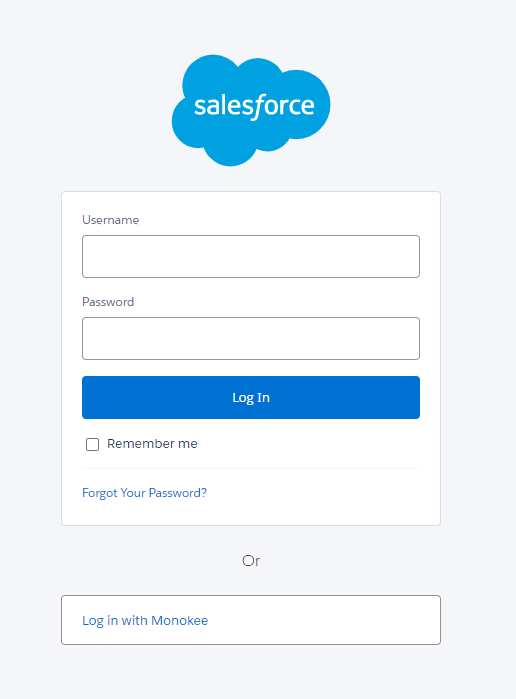
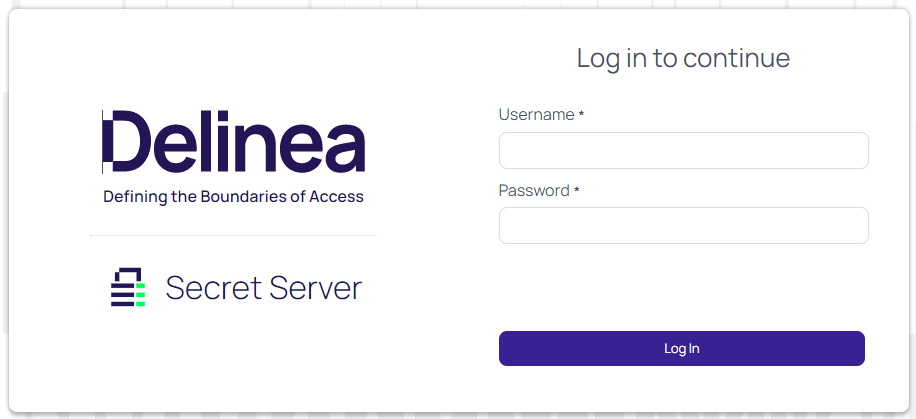
On the other hand, to test the SP initiated flow you must go to the login page of your Secret Server domain, at the url https://<my-domain-name>/secretserver.
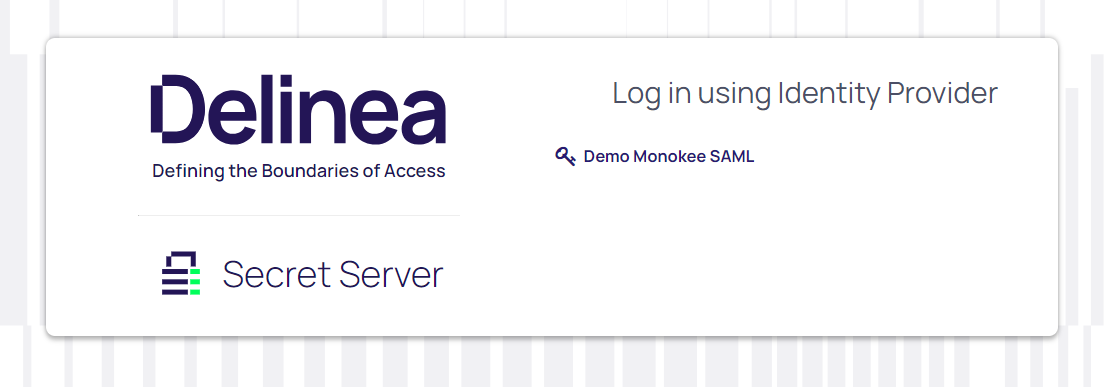
By clicking on the Demo Monokee SAML link will start the SP initiated login flow which will first authenticate the user according to the chosen security flow and then send back to the home page of the configured secret server domain.